
If you’ve ever come home to wilted plants or wasted water from over-watering, a drip irrigation system is the answer. It delivers water slowly and directly to the root zone of each plant — saving water, saving time, and keeping your garden consistently healthy.
This guide walks you through installing a basic home garden drip irrigation kit step by step. No plumber needed. No complicated tools. Just a little planning and about 30 minutes of your time.
What’s Included in the Kit
Before you start, make sure your kit contains the following components:
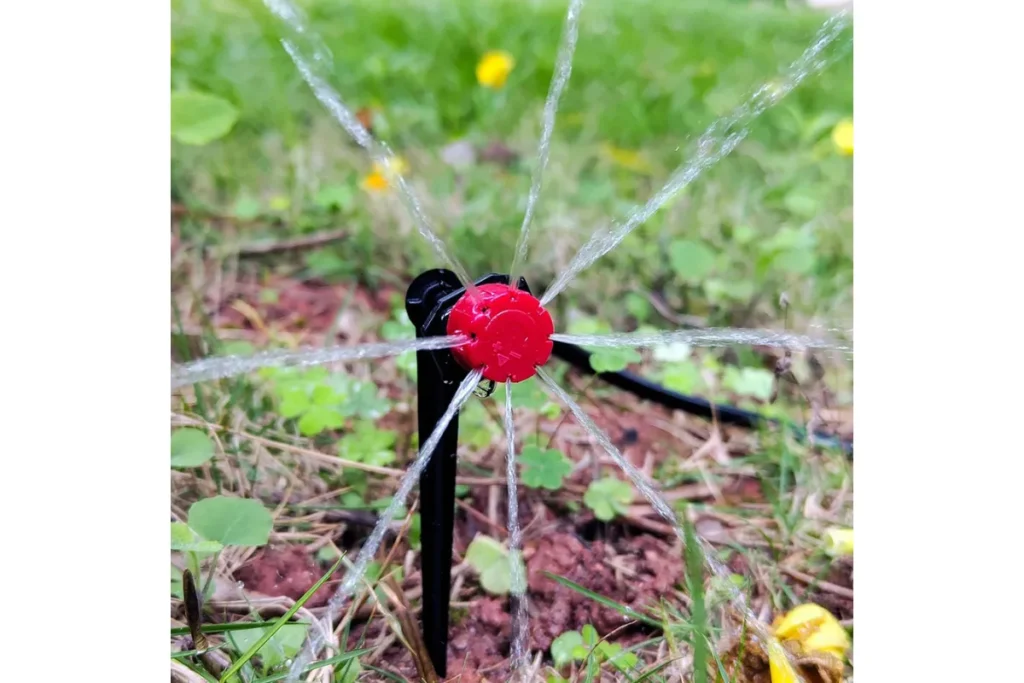
- Adjustable Drippers (Red) — control water flow per plant, adjustable from minimum to maximum
- T Connectors — split the pipe into branches to reach multiple plants
- Drip Pipe — the main flexible tubing that carries water through your garden
- Pipe Holders (Black) — secure the pipe to the ground or along edges
- Quick Connectors (Green & Black-Green) — connect the system directly to your water tap
If any component is missing, contact us at TopGadgets.pk and we’ll help you sort it out.
Step-by-Step Installation Guide
Step 1: Plan Your Layout and Cut the Pipe
Start by walking around your garden and deciding where each plant needs water. This is the most important step — a good plan means fewer adjustments later.
- Sketch a rough layout showing where your plants are and how the pipe will run between them
- Measure the distances and cut the drip pipe to match your garden layout using scissors or a pipe cutter
- Keep the pipe runs as short and direct as possible to maintain good water pressure
Step 2: Install the T Connectors
T connectors let you branch off the main pipe line to reach plants on either side.
- Push a piece of drip pipe firmly into each of the two horizontal ends of the T connector
- The third opening (the stem of the T) is where your dripper branch will connect
- Repeat this at every point along the main line where you want to add a dripper
- Make sure each connection is pushed in fully — a loose connection will drip or leak
Step 3: Connect the Drippers
Each plant gets its own dripper, connected to the main line via a short piece of pipe.
- Cut a short piece of pipe (10–20 cm is usually enough) for each dripper
- Push one end of this short pipe into the stem of the T connector
- Push the other end into the red adjustable dripper
- Position the dripper near the base of the plant, close to the roots
- Repeat for every plant in your system
Step 4: Connect the System to Your Water Tap
Now connect the entire pipe network to your water supply.
- Take the Green Quick Connector and push the main drip pipe firmly into it
- Take the Black-Green Quick Connector (female thread) and screw it onto your tap’s male thread
- Click or screw the two quick connectors together to complete the connection
- Make sure the tap connection is tight — hand tighten is usually enough for these push-fit connectors
Step 5: Test the System
Before securing everything in place, do a test run.
- Turn the tap on slowly
- Walk along the pipe and check that water is flowing from every dripper
- Look for any leaks at the T connectors or quick connectors — push connections in more firmly if needed
- Adjust each red dripper by turning it to control the flow rate — clockwise reduces flow, anti-clockwise increases it
- Set each dripper to suit the water needs of that specific plant
Step 6: Boost Pressure If Needed
If some drippers have weak or uneven flow — especially on longer pipe runs or in homes with low water pressure — you may need a small booster pump.
- A small 12V or 24V DC diaphragm pump is ideal for home garden drip systems
- Install it between the tap and the start of the drip pipe
- This ensures every dripper in the system gets consistent pressure regardless of distance from the tap
We stock booster pumps and irrigation supplies if you need one.
Final Setup: Secure and Tidy the System
Once the test run looks good, finish the installation:
- Use the black pipe holders to pin the drip pipe flat against the soil or along the edge of planters — this keeps the layout clean and stops the pipe from moving
- Check all T connector joints one more time and press any loose ones in fully
- Make sure every dripper is positioned close to a plant’s root zone, not spraying into open air
Tips for Getting the Best Results
- Water in the early morning — less evaporation, better absorption
- Use a timer on your tap if available — it automates watering and prevents over or under watering. We carry automatic water timers that connect directly to the tap
- Check dripper flow monthly — drippers can get blocked by mineral deposits. Remove and rinse them in clean water if flow drops
- Flush the main pipe at the start of each season by opening the end cap briefly to clear any debris
Get the Kit from TopGadgets.pk
All the components mentioned in this guide — drippers, T connectors, drip pipe, pipe holders, quick connectors, water timers, and booster pumps — are available in our Irrigation Supplies category. We also take custom orders if you need a specific configuration or quantity.
Have a question about your installation? Contact us or message us on WhatsApp at +92 300 942 6742 — we’re happy to help.